Another year has passed and Valentine’s Day is almost here again. For most people, it’s a day of flowers and fine wine, of fancy dinners and of course chocolate. Make your Valentine’s Day a little sweeter this year by creating your own chocolate truffles.
It’s the simple things that sometimes prove the most difficult to perfect. Though a truffle is essentially nothing more than elevated ganache, there are a number of things to be mindful of when making them. Allow us to help you create the perfect truffle by walking you through the process, so you can avoid some of the more common pitfalls.
The Quality of Your Chocolate Matters
As a dessert that technically calls for just two ingredients, the quality of said ingredients is imperative. When creating a truly great truffle you need to be using truly great chocolate. Reach for a chocolate with a cocoa percentage of at least 60%-70%. By making sure that you invest in quality chocolate not only will you have a better-tasting end product, but cheaper chocolate, especially those in chip form, have so many added stabilizers that they end up producing a ganache with a gritty, grainy texture.
Chocolate, as you know, comes in several varieties. Depending on what kind of chocolate you use (dark, milk, or white) it can affect not only the color and flavor of your truffles but also your ratio of chocolate to cream. Since both milk and white chocolate are softer than dark, be sure to cut your volume of cream in half, otherwise you’ll end up with truffles so soft they won't be able to hold their shape. If you’re looking to make a dark chocolate truffle, we recommend using a chocolate of at least 70% cacao content. You could use any of our Valrhona bars, however, if you’re planning on making a large amount of truffles, and would rather skip cutting up pounds of chocolate, opt for the more convenient option and grab a bag of the pistoles.
If you’re going a different route, or perhaps the flavors of your Valentine’s menu would complement something other than dark chocolate, consider a lighter alternative. There are some wonderful white and blonde chocolates that will give you a completely different flavor profile and eating experience than the traditional milk or dark varieties.
Which Creams to Choose and How to Use Them
Now that we have addressed the issue of chocolate, we can’t forget the cream. The labels used for cream can sometimes be confusing, there are so many of them! So what’s the difference between heavy cream, whipping cream, and heavy whipping cream? The short answer is fat content. Whipping cream represents the lightest, with as little as 30% fat. Whereas heavy cream, and heavy whipping cream, have as much as 6% more milk fat. While this can make a big difference if you’re using your cream for piping decorations, or making pastry cream, either one can be used in truffles. However, we recommend using the cream with a higher percentage of milk fat since it will result in a truffle that is richer and rounder in mouthfeel.
So now that we’ve selected our cream, now let's talk about how to use it. Every recipe for ganache instructs you to begin by bringing your cream to a boil, then tells you to pour it directly over your chocolate. This practice of pouring boiling cream onto chocolate is not recommended. If you add the cream while it is still too hot you run the risk of the ganache “splitting” - when the cocoa butter separates from the chocolate - resulting in a greasy congealed mess. Instead, we recommend waiting a moment after your cream comes to a boil to incorporate it. By practicing a little patience, and allowing your cream to cool slightly you’ll maximize your chances of creating a silky smooth ganache.
The Right Tools for the Job
Once you’ve reached the stage of incorporating your cream and chocolate you may be tempted to reach for the whisk. Unfortunately, a whisk will integrate air into your ganache, something we want to avoid. Instead, we recommend using a rubber spatula. While this method may take longer, the results will speak for themselves.
Properly Seasoning your Ganache
Once you’ve successfully emulsified your cream and chocolate, now it’s time to add in any flavorings or extracts if using them. Adding your flavorings to the cream while it’s still on the heat will result in alcohol-based extracts burning off and evaporating, causing you to lose most of their flavor. To stay safe, wait until you have a fully emulsified ganache before adding your extracts.
When deciding on flavorings we offer a word of caution: avoid incorporating too many, or even too much of any one. Remember the chocolate should be the star of the show! Additionally, too much liquid will make your truffles difficult to handle and shape.
Along with the extracts, now is the time to also add in your salt. Although you probably already know this, it bears repeating: salt is imperative to any recipe. Salt in itself is not a flavor but an enhancer, and has the ability to make foods taste more like “themselves”. So don’t forget to add a pinch to the mixture. We also like to finish our truffles with salt. Instead of rolling them in cocoa or nuts, try dipping them in a little tempered chocolate, and before they’ve set, finishing them with a sprinkling of flaky salt. This adds a little textural interest and above all gives you that great salty-sweet combo.
Allowing your Ganache to Set
Once your ganache is made, and your truffles are flavored and seasoned, you have to give it time to firm up. The best way to do this is to transfer the mixture to a parchment-lined shallow baking pan. By placing the chocolate in a container with a larger surface area you are able to speed up the cooling process. To compound this effect, place the ganache into the refrigerator. About an hour later your ganache should be firm enough to scoop.
To keep things consistent, we like to use a portion scoop to make our truffles. A #100 scoop is small enough to still look petite, yet large enough to give us just the right amount of chocolate for a nice two-bite truffle.
Decorating Chocolate Truffles
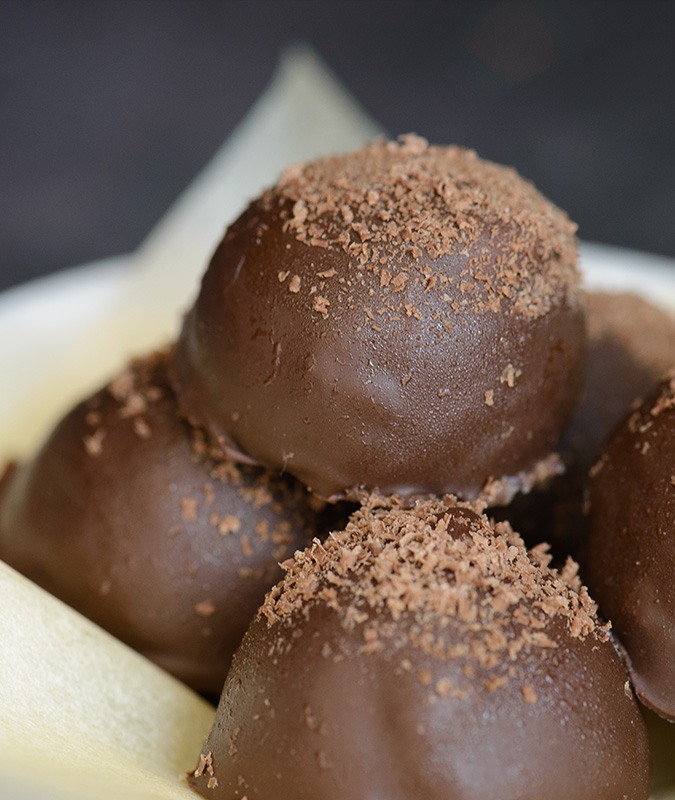
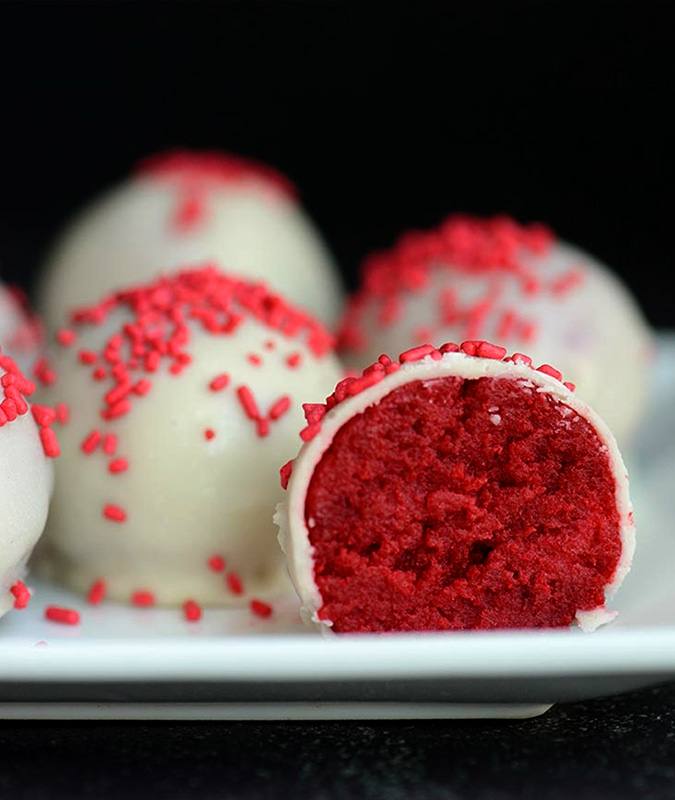
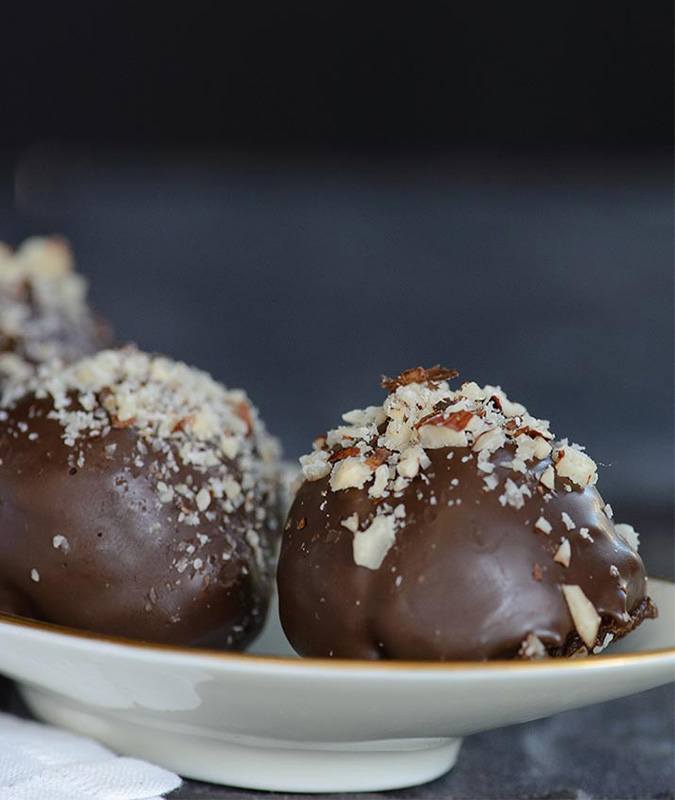
Now onto the fun part, the decorations! You can go a number of directions with this: keep it classic by simply rolling them in cocoa powder. Or get a little creative and try rolling them in some chopped nuts, freeze-dried fruit powders, or cocoa nibs. If you want to go all out, temper some chocolate, and coat each truffle in a shell of shiny chocolate.
However you decorate your truffles, you’re now equipped with all the important information to help you confidently and masterfully make them!